How to Use a Flute Laminating Machine for High-Strength Corrugated Boxes
You‘re running a batch of heavy‑duty shipping boxes for industrial parts. The spec calls for high edge crush resistance and puncture strength. You’ve selected single‑face C‑flute medium and a sturdy linerboard. The laminator is warmed up, glue is mixed, and the first few sheets look perfect. Then you walk to the stacking station and peel a sample. The bond is patchy. Some areas show almost no glue transfer. Worse, near the trailing edge, the flute structure looks flattened—compressed beyond recognition.
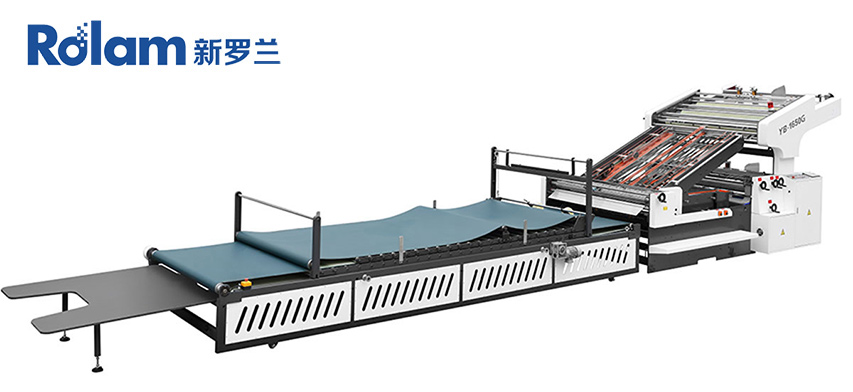
This is the daily reality of operating a flute laminating machine. The difference between a box that survives the distribution chain and one that collapses at the first pallet stack often comes down to three parameters set correctly: glue gap, speed, and nip pressure. This guide walks through the key decisions for high‑strength corrugated lamination—from adhesive selection to pressure testing—based on practical experience with Youbond‘s YB‑1650G automatic laminator for corrugated‑to‑corrugated paper.
What flute lamination means for box strength
The bond between the fluted medium and the linerboard isn‘t just about staying stuck—it directly determines the structural integrity of the finished box.
How the bond affects edge crush and puncture resistance
When the adhesive penetrates the flute tips and linerboard fibers, the box can distribute load across a wider area. Poor bonding leaves voids at the glue line. Those voids become stress concentrators. Under vertical load, the box collapses at the weakest flute joint. Under puncture, the liner delaminates rather than resists penetration.
Which flute type for which job
-
B flute (3mm) – Thicker, coarse. Best for shipping heavy contents. High puncture resistance, but not suitable for fine print.
-
C flute (4mm) – Most common for shipping cartons. Good cushioning, moderate printability.
-
E flute (1.5mm) – Thin and dense. Excellent for high‑quality printing and retail display boxes. Requires more precise pressure control to avoid crushing.
Daily machine setup before first lamination
The settings you dial in during warm‑up determine the next eight hours of production. Don’t rush this.
Setting the glue roller gap for different flutes
The gap between the glue applicator roller and the doctor blade determines how much adhesive is applied. Too little gap, and the glue film is too thin → weak bond. Too much gap, and glue squeezes out the sides → waste and mess.
A practical rule: set the gap to paper thickness plus 0.2–0.3mm. For typical 200–250gsm linerboard (roughly 0.25–0.30mm thick), start with a gap of 0.45–0.60mm. Adjust up for heavier board, down for lighter board.
Preheat when the shop is cold
Starch‑based adhesives thicken and set faster in cold conditions. If your plant temperature drops below 15°C, turn on the pre‑heat rollers (where available) before the first run. The YB‑1650G includes an intelligent temperature control system for the glue application section, which helps maintain consistent adhesive viscosity. Without preheat, the glue may gel on the roller before transferring to the paper, creating dry streaks and weak bonds.
Adhesive selection – starch vs PVA
There’s no single “best” adhesive. Each fits different production needs.
When to use starch adhesive
Starch is cost‑effective, widely available, and provides good bond strength for standard corrugated boxes. It has a slower set time, which allows more open time for alignment corrections. Use starch for general packaging where water resistance isn‘t required and where production speed is moderate (up to about 100 m/min). Starch is also more forgiving of minor dust or contamination on the paper surface.
When to use PVA adhesive
PVA (polyvinyl acetate) sets faster than starch, allowing higher line speeds. It also offers better water resistance, which matters for boxes that will be stored in humid conditions or shipped in refrigerated containers. The trade‑off is higher cost and less open time—once the PVA touches the paper, you have seconds to complete the bond before it tacks up. Use PVA for water‑resistant packaging or when your line speed exceeds what starch can handle.
Below is a quick comparison:
| Adhesive Type | Set Speed | Water Resistance | Cost | Best Use |
|---|---|---|---|---|
| Starch | Slower | Poor | Low | Standard shipping boxes, moderate speeds |
| PVA | Faster | Good | Medium–High | High‑speed lines, humid environments, refrigerated goods |
Speed and pressure – avoid flute crush
Flute crush is the single most destructive defect in corrugated lamination. The flutes collapse under excessive pressure, destroying the board‘s strength properties.
Visual signs of flute crush
After laminating, hold the board up to a light or cut a cross‑section. Healthy flutes are open, evenly shaped, with clear glue menisci at the tips. Crushed flutes appear flattened, collapsed, or angled. The board feels thinner and more flexible when you flex it by hand. In severe cases, the flute walls may be completely horizontal.
Recommended starting speeds by flute type
These speeds are starting points for a machine of the YB‑1650G class with standard starch adhesive:
| Flute Type | Recommended Speed (m/min) | Notes |
|---|---|---|
| E flute | 80–100 | Thinner flutes tolerate higher speed |
| B flute | 60–80 | Moderate speed, balance between output and quality |
| C flute | 50–70 | Slower due to deeper flutes; risk of folding |
If you‘re switching to a higher‑speed PVA adhesive, you can increase these numbers by 10–15%. Always run a test at the lower end of the range, then step up.
Testing nip pressure with carbon paper
This field test takes two minutes and costs almost nothing. Cut two strips of carbon paper (or use printer transfer paper) and place them between the laminating rollers—one at the drive side, one at the operator side. Run the machine for a few seconds with no paper. Remove the carbon strips and examine the impression.
A perfect impression is a uniform width across the entire strip. If one side is narrower than the other, the pressure is unbalanced. Adjust the side‑to‑side pressure adjusters until both impressions match. If the impression width is too wide overall, reduce total pressure (too much pressure flattens the flutes). If too narrow, increase pressure.
Handling warped or curled liners
Liners that arrive curved or warped feed poorly and cause misregistration. You can fix most curl with simple adjustments.
Pre‑straightening with flex rollers
Most automatic laminators have a set of flex rollers (also called “breaking bars”) before the glue section. Adjust these rollers so they gently bend the liner in the opposite direction of the curl. For a liner that cups upward (edges higher than center), lower the flex roller pressure slightly. For a liner that cups downward (center higher than edges), raise the pressure.
Tension adjustment on unwind stands
Uneven tension across the web width causes one edge to feed faster than the other, resulting in skewing or buckling. Check that the brake tension on the liner unwind stand is balanced. A simple test: while the machine is stopped, pull the liner edge by hand on both sides. Both sides should require roughly the same pull force to move.
Quality check after the first 50 boxes
Don‘t wait until the whole batch is finished to inspect. Run 50 boxes, stop, and examine.
Peel test – adhesive transfer pattern
Peel the linerboard away from the corrugated medium by hand. A good bond shows adhesive transferred evenly across the flute tips, with no bare spots. The paper fibers should tear, not pull cleanly off the glue line. If you see large areas with no glue, your glue gap is too small or the rollers are dirty.
Cross‑section inspection under light
Cut a 2‑inch strip perpendicular to the flute direction. Hold it up to a bright light. Look for:
-
Uniform glue menisci (small curved deposits at each flute tip)
-
No visible gaps between liner and medium
-
Flutes fully open, not collapsed
-
No glue squeeze‑out into the flute valleys
Edge compression test sample
Cut a small square (2×2 inches) from the edge of a laminated sheet. Place it between two flat surfaces and press down firmly with your thumb. A well‑laminated board feels stiff and resists compression. A weak board feels spongy or delaminates at the glue line.
Check for skewing or misalignment
Stack ten boxes on top of each other. Look at the edges. Are they flush? If one corner sticks out, the liners are feeding out of square. Check the side guides and unwind tension.
Frequently asked questions about flute laminating
Q: Can I laminate pre‑printed liners without smearing the ink?
A: Yes, but you need to ensure the ink is fully cured. For water‑based flexo inks, allow at least 24 hours drying time before laminating, or use a heated tunnel to accelerate drying. Also, reduce the glue roller pressure slightly to avoid smearing the print on the liner surface. Solvent‑based inks are generally more resistant to smearing. Always run a test at lower speed first.
Q: What is the minimum flute height my machine can handle?
A: Most automatic flute laminators, including the YB‑1650G, can run E‑flute (1.5mm) reliably. Some machines can go down to micro‑flutes like F or N (0.8–1.2mm) with precision pressure control and a smooth feed path. If you routinely run micro‑flutes, request a machine configuration with enhanced pressure control and smaller‑diameter application rollers.
Q: How often should I replace the glue applicator rolls?
A: In a two‑shift operation (16 hours daily), glue applicator rolls typically last 3–5 years. Signs that replacement is needed: visible scoring or grooving on the roller surface, uneven glue transfer (thick in some areas, thin in others), or increased glue consumption without higher bond strength. The YB‑1650G uses stainless steel glue rollers, which resist rust and corrosion better than carbon steel, extending service life.
Fine‑tuning for your production mix
Every corrugator plant has its own mix of board grades, flute types, and adhesive formulas. The “perfect” settings from a manual are starting points. Your real competitive advantage comes from building your own knowledge base.
Create a log for each material combination you run regularly. Record:
-
Linerboard weight (gsm) and source
-
Flute type (B/C/E)
-
Adhesive type and batch number
-
Machine speed (m/min)
-
Glue roller gap (mm)
-
Nip pressure setting (using your machine’s pressure gauge reference)
-
Shop floor temperature (°C)
After each successful run, note these numbers. After a problem run, also note what went wrong. Over six months, that log becomes a custom operating manual that no generic guide can match.
The YB‑1650G supports this process with an intelligent automatic sheet‑size adjustment system and servo‑controlled intermittent positioning. Its maximum lamination speed is 100 m/min, with a maximum output of 10,000 sheets per hour and registration accuracy of ±1.5mm. The machine is designed for corrugated‑to‑corrugated lamination, handling paper thicknesses from 200 to 500 gsm. Using the daily checks and parameter logs described here, you can reduce setup time between jobs and achieve consistent high‑strength bonds across your entire product range.
Need help fine‑tuning your flute laminator for a specific material mix? Contact Rolam for on‑site commissioning support or remote parameter guidance. Share your typical flute types, linerboard weights, and production speed targets—their engineering team can help you establish baseline settings for your most common jobs.